
Google+ was built for sharing, and photos is a big part of the experience, as you'll see from the magical features and simple (but effective) editing tools that Google provides.
Let's get started with the basics:
Auto-backup

This feature is what pulled me into using Google+ originally, it's called Auto-backup. Auto-backup is a feature that is built-into the Google+ app for Android and iOS devices that will automagically upload photos that you've snapped on your phone (or tablet) to a folder that only you can see.
Photos can be uploaded in full size but will count towards your free 15Gb of shared Google Drive storage. You can upload photos as many photos as you like in standard size (set as default), so there's no need to worry about hitting your limit!
Lightbox

The photo lightbox is a distraction-free photo viewer which makes your pictures really pop. To view photographs in the lightbox just click on an image in the stream. In the lightbox, you can also maximise the photo with one click by tapping the "Slideshow" button to view a full-screen slideshow of photos in an album.
Google+ will automatically enhance your photo, and it almost always does a wonderful job, but if you'd like to take control, you can. To edit, just click the "Edit" button at the top, in which you can tweak the photo to your liking, and add filters and effects (and plenty more).
Clicking on "Photo Details" will reveal useful information about the image, such as where the shot was captured and other camera metadata like focal length, exposure and other specifics.
That's not all, from the lightbox you can tag people, rotate, crop and more, so go explore!
Uploading & Sharing Your Photos
Sharing your photos is simple and just takes a couple of clicks.
Meet the Sharebox
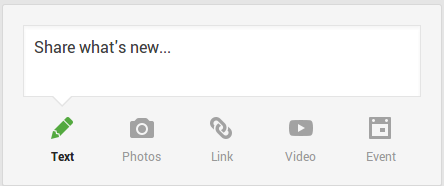
Uploading
Just click the camera button (first icon on the left of the sharebox), now choose your source. You can:
- Add photos - This will open up your file browser, for quick and easy sharing
- Select from Google Drive - Clicking this will display a list of folders from your Google Drive, just search or navigate as your normally would in a file browser, and select your photos
Sharing your photos

- Toggle auto-enhance
- Add text
- Rotate
- Remove
Once you're all set, type a message in the sharebox (optional) and select your circles or select the people you'd like to share to by typing in the "+ Add more people" box or visually, using the friend picker (to the right of the box). When you're done, just hit "Share".
Browsing Your Collection
Google has really made it quick and easy to view your photo collection, just click on "Photos" from the navigation ribbon.


From there, you will see your highlights, a feature which takes only the best picks from your albums (don't worry, your non-picked photos are still there). If you look at the bar at the top of the screen, you'll see that you can switch from Highlights to view all your photographs in one place, album, or by auto-backup.

Clicking on "Albums" will take you to all the albums you've ever created, and the great thing is that they'll be synced with the Gallery app on your Android devices, which I still find really awesome.
You can quickly see who your albums are shared to, see the icon on the bottom right of each album? The icon will be different depending on who they're shared with.
Auto-Awesome!
Auto-Awesome is a feature which will automatically enhance your photographs when they're uploaded by auto-backup. Snapped some shots rapidly? Google will combine them into a Motion Auto-Awesome, or in other words, an animated GIF. That's not all, expect to see automatic panoramas and photobooth style pictures. I'll leave the rest as a surprise...
If you're not a fan, no problem. You can easily toggle the setting for Auto-Awesome by clicking the settings icon from the Google+ navigation menu and unticking Auto-Awesome.
#hashtags
Hashtags are a great way of getting your photos into the eyes of other users. Let's say you've took some really good street photos, try adding #streetphotography or #streetpics to your shared post. Once you've added a relevant hashtag, they'll now appear in that stream, which means that when users search Google+ with that hashtag, your photos will show up there.
Simple!
What's your favourite Photos feature on Google+? Let us know in the comments below!